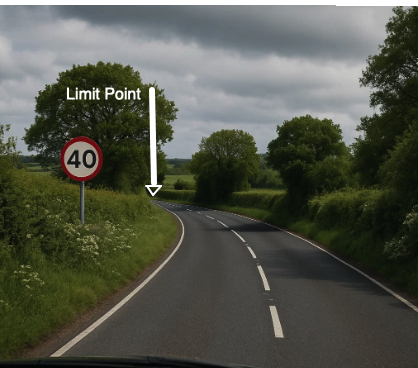
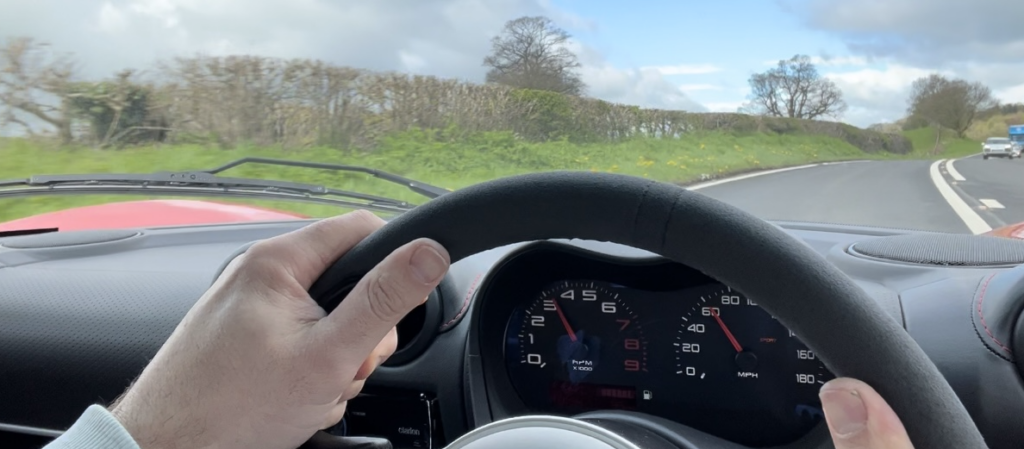
The limit point, also called the vanishing point or limit point of vision, is the furthest patch of road you can clearly see on your side, usually where the left and right edges seem to meet. Read its movement to judge corner severity and a safe speed:
- Moves toward you: ease off the power
- Stays put: maintain your speed
- Moves away: the bend is opening, add power if safe
This supports the core safety rule: always be able to stop well within the distance you can see to be clear.
In Roadcraft-based training, the limit point is the furthest spot on the road surface you can see without obstruction, the practical end of your sight line. On a corner, it’s where the road edges appear to meet; over a hill, it’s the crest; at night, it’s the reach of your headlights.
This concept directly connects to the Highway Code’s stopping-distance rule: you must always travel at a speed that allows you to stop safely within the distance you can see to be clear. The limit point gives you a live, visual reference for applying that rule in real time.

Why advanced drivers use it
Consistent, safe speed. The limit point acts as a live mirror of the bend’s severity.
* Closing (moving towards you): the bend is tightening or your speed is too high, slow down so you can still stop within the visible distance.
* Static: your speed matches the bend, hold it, but stay alert.
* Opening (moving away): the view is extending, progressively add acceleration, ease the steering, and keep within the “stop-within-what-you-can-see” rule.
Smoother, safer cornering. Because speed is set early and fine-tuned only as the view develops, all inputs remain progressive. That means better grip, steadier balance, and more comfort for passengers.
Sharper anticipation. Focusing on the limit point makes you more alert to what may be concealed just beyond it, whether a slow vehicle, a cyclist, or loose gravel. It’s a disciplined, evidence-based way of reading the road rather than relying on guesswork.
A common coaching language. In the IPSGA system (Information, Position, Speed, Gear, Acceleration), limit-point observation underpins the Speed phase on bends. It provides an objective visual reference to judge, set, and maintain the right pace.

How to use the limit point (step-by-step)
Approach
* Information: Read the road ahead for clues, signs, chevrons, hedge and tree lines, camber, surface changes, and nearby junctions.
* Position: Place the car for maximum view and safety while staying within your lane. Don’t cross the centre line just to see further. On right-hand bends (left-hand in LHD countries), a slightly wider approach within your lane can improve the view without compromising legality or safety.
* Speed: Choose a speed that allows you to stop safely before the limit point, on your own side of the road, without abrupt braking. If the limit point begins to close, ease off speed early and progressively.
* Gear: Select a gear that gives flexibility and control at your chosen speed.
* Acceleration: As the limit point starts to move away, smoothly feed in throttle, unwind steering, and let speed build, always staying within the “stop-within-what-you-can-see” principle.
Mid-bend adjustments
If the limit point closes unexpectedly mid-corner, due to a tightening radius, crest, or hidden hazard—prioritise safety. Reduce speed smoothly and progressively, using gentle, balanced braking if appropriate for the conditions, while maintaining a margin that allows you to stop in the visible distance.

Night driving
At night, your headlights effectively set the limit point. On dipped beam, your usable view may be only a few dozen metres; the main beam extends this much further. Always adjust speed to match that limited “tunnel of vision” and be prepared to dip for oncoming traffic. Traffic will often appear mid-corner, so prepare for this.
Common pitfalls (and how to avoid them)
“Chasing the view” by crossing the centre line. Some drivers try to make the limit point open faster by drifting over the centre line (offsiding). It’s both risky and unnecessary; keep to your side and use positioning within your lane to balance safety and vision.
Fixating on one spot. The limit point is just one tool. Keep scanning, near to far, left to right, for surface changes, junctions, pedestrians, cyclists, and other vulnerable road users.
Ignoring road width. On narrow lanes the same distance ahead offers far less space to manoeuvre. Build in extra margin so you can still stop safely.
Out-driving your view. Treat crests, brows, hedges, and large vehicles as moving limit points. Until the view opens again, hold a margin that allows you to stop in time.
Overconfidence on familiar roads. Even if you “know” a bend, drive to what you can actually see on the day. Conditions, surfaces, and traffic all change. The limit point is there to keep you safe.
